Wednesday 31 July 2013

Gluten Free Banana Bread

-->
I have always loved banana bread. It is moist, fruity and perfect as a pudding or with cream cheese on top. We had about 15 bananas in the house today, and as it is only my dad and myself that like them I decided to get rid of a few by making banana bread! The best bananas for this recipe are those that are a bit far gone…a few brown speckles on them, soft or with a few bruises. It’s the perfect way of getting rid of the bananas you don’t want to eat!


 Bananas are happy fruits! They can help overcome depression, anxiety and sometimes insomnia due to high levels of tryptophan, which is converted into serotonin – a mood regulating neurotransmitter. They are also amazing for coeliacs specifically! Coeliacs tend to get more stomach pain, more toilet trouble and more indigestion. Bananas have high levels of pectin which aids digestion, they also act as a prebiotic – stimulation growth of healthy, friendly bacteria in the bowel. They are high in fibre, which helps constipation, but can help with the runs as they soothe the digestive tract. Finally they work as an antacid, so say goodbye to indigestion, heartburn and acid reflux! 


All in all, bananas are a bit of a super fruit for coeliacs!


Most banana breads are heavy on the calories due to high levels of sugar. So to help maintain a flat stomach I have altered a normal recipe to make it extra good for you! 


I have used ¼ cup of Agave nectar, a natural sweetener that I like to use on cereals and on toast. Unlike normal sweeteners it is incredibly good for you. It contains anti-inflammatory and immune system boosting properties. In face, it is so good, at one point it was used to treat wounds!


Prep time: 10 minutes

Cook time: 1 hour

Serves: 16 slices


So what will you need?


Cup measurements – I do this recipe in cups because it makes life a lot easier, if you don’t have an exact measurement, use a small mug (that’s what I used to do!)

Mixing bowl

A couple of spoons

Hand whisk

  
Ingredients:


·   1/2 cup melted low fat butter

·   1/2 cup granulated sugar

·   1/4 cup agave nectar

·   1/4 cup sweetener

·    3 large eggs

·    2 cups mashed ripe banana (about 5 small bananas)

·    2 1/4 cups doves self-raising all purpose flour

·    1/4 teaspoon baking powder

·    1 teaspoon ground cinnamon

·    1 teaspoon ground nutmeg

·    3/4 cup chopped walnuts

·    1/4 cup chopped cashew nuts

·    1 tablespoon granulated sugar to sprinkle on top


Directions:


Preheat the oven to 180oc.
Grease a 9" x 5" loaf pan with margarine, olive oil or butter 
In a large bowl, stir together the melted butter, sugar, sweetener and Agave nectar


Add the eggs, mixing until well blended.  

Add the mashed banana, flour, baking powder, cinnamon and nutmeg, mixing until blended.


Add walnuts and cashew nuts, stirring gently
 

Spoon the batter into the prepared loaf pan.

Sprinkle with granulated sugar


Bake the bread for 45 minutes

Cover the load with foil and bake for a further 15-20 minutes – it is done when only a few breadcrumbs stick onto a knife when inserted.

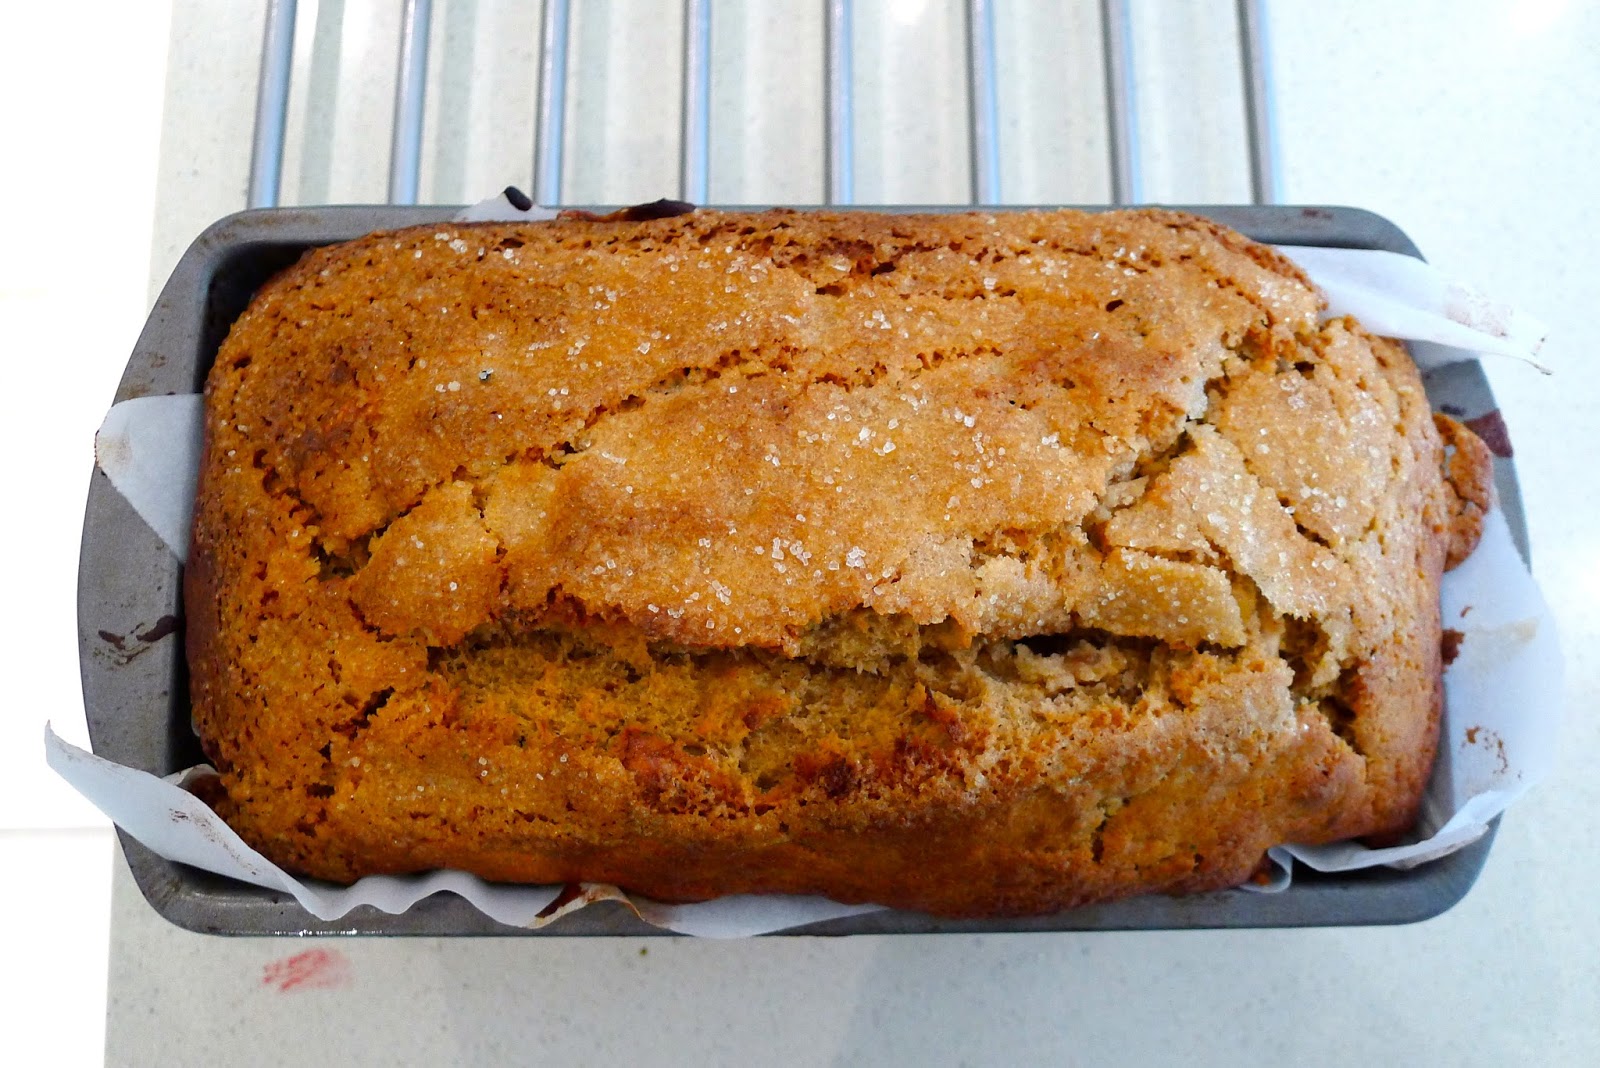
Leave in the loaf pan for 10 minutes, then gently move to a cooling rack. 

It is delicious! So try if yourself and let me know whether you thought it was as good as the gluten banana bread! I think its so much better!


Monday 29 July 2013

Paprika Guacamole

-->
I’m attempting to get a bikini body for my holiday at the end of summer. This involves daily runs, daily toning and of course…eating as healthy as possible. Now I have to be honest…I don’t usually eat avocados because for students they’re a little expensive. However, this week they were on offer so I decided to treat myself to a little bit of home made guacamole! This may not be the most beautiful Guacamole due to the paprika giving it a dull colour….but the wonderful flavor makes up for it!


Although Avocados are not great on the calorie side… approximately 320 calories with 250 coming from fat, a single avocado contains 55% of your RDA of fiber and 33% of your RDA of vitamin C.


The idea of so many calories from fat may be off putting, but fear not! Avocados are rich in monounsaturated fat. A large amount of research shows that monounsaturated are very good for general health and can help towards living a longer life. These health benefits include:

·      Decreased risk of breast cancer

·      Reducing cholesterol levels

·      Decreased chance of heart attacks and strokes

·      Weight loss assistance

·      Loss of belly fat


The paprika in this recipe not only makes it taste delicious, it adds to the health benefits too. It is one of the best spices you can have for levels of anti oxidants. This mean it can contribute to good cardiovascular heath as well as prevent cancer. The high levels of anti oxidants means that it can neutralize damaging free radicals and encourages detoxification. Some research has also shown that it is a good anti inflammatory and stress reducer.


So go on…indulge in my paprika guacamole! It may taste unhealthy, but in fact you are simply helping to keep your heart happy and your weight down!


To make this you will need:

Chopping board

Knife

Bowl

Fork


1 Avocado

½ small onion

1 plum tomato

1 small garlic clove

1 tsp. paprika

½ tsp. salt

1 tbsp. lemon juice or squeeze ¼ lemon


1.     Cut the avocado in half and remove the stone

2.     Score the avocado into little squares and spoon it out into a bowl

3.     Chop ½ a small onion finely and add into the bowl

4.     Chop a small clove of garlic into tiny pieces and add to bowl

5.     Chop a plum tomato into small cubes and add to bowl

6.     Add the lemon juice, paprika and salt.

7.     With a fork, mash the mixture together until it is at a consistency you prefer…I like mine not too smooth but not too lumpy. Some prefer to not mash at all, some may with to blend it…it’s whatever suits you!

8.     To serve, spoon the mixture into a ramekin and enjoy!


Sunday 28 July 2013

Coconut Macaroons

-->
When I first got diagnosed with coeliac disease Coconut macaroons were a godsend! It was the only gluten-free sweet treat the local co-op sold, so for those nights when all of my housemates were indulging with a cherry pie, I had a go-to sweet treat!

The only issue is, they were extremely high in calorie! I know it’s a bit obvious – as they’re supposed to be a treat, but I knew that they could be made a little less unhealthy! Its just under 400 per macaroon. So I set myself a mission to make one lower in calorie. I have succeeded! But unfortunately I managed to decrease the total calories per macaroon by only100 calories per macaroon…I was hoping for much more!
The good news is, they taste better than the ones you can buy and it takes next to no effort to make!

Serves: 10-14
Calories: Approximately 250 per macaroon
Prep time: 35 minutes
Cooking time: 30 minutes
Ingredients: 2 eggs
                       8 Oz desiccated unsweetened coconut
                       3.5 Oz sugar with ½ cup sweetener
                        1.5 tbsp. powdered almonds

Directions:
Pre heat the oven to 170 degrees (if it is fan assisted). Whisk the eggs up to the consistency that you would make an omelet…so just make sure its pretty light, but not too bubbly!
Stir in the coconut and add the sugar, sweetener and almonds.
Leave to stand for 20 minutes (I usually leave it for longer because I go to the shops or do some work. It just means you can make them in advance really!). This is an important step because it is what will make your macaroons nice and squidgy in the middle...and moist rather than dry!
Take an ice cream scoop and scoop small dollops onto a baking tray with greaseproof paper on it.
Make for 30 minutes.
Cool completely.
If you’re feeling cheeky melt some dark chocolate and drizzle over the macaroons once they have cooled. Adds a touch of luxury!

Go ahead and make one of these delicious sweet treats! For 100 less calories than you will find in a store!

Happy baking! :)
Photo attribution to Mike Richardson 

Wednesday 24 July 2013

Look What We Found! Staffordshire Chicken Tikka.

-->
At the moment I seem to be living off microwave meals. Only cooking for myself and having little time in the evening is something I am just not used to. Microwave meals are a great option for me at the moment whilst I continue my work experience at Dinosaur PR.


Yesterday, for some odd reason, I was craving curry. Luckily enough, as a treat, my mum bought me a Look What We Found! Staffordshire Chicken Tikka with basmati rice. Now my mum is a little bit obsessed with local food. She loves the farm shops near by….she grows her own herbs and will buy British at every opportunity. My mum immediately loved this brand as much as I did, and occasionally buys some of their meals for me. So as some treats for this week she packed me off to York with Staffordshire Chicken Curry and Casserole. Nom nom nom!


The best thing I found with this meal is that I had the one with rice included, and it was still only 378 calories for the portion! I was so surprised because rice dishes are usually really weighty on the calories side, as well as the fact that curry and rice is almost impossible to get under 500 calories. So I popped it in the microwave, put the kettle on and put some salad in my bowl just to bulk it out a bit. 2 minutes later, I had the curry I was craving all day! What more can you want!


The curry had plenty of chicken in which really impressed me. This seems to be a common feature with the Look What We Found! range. There is always plenty of protein, which I love because it keeps you fuller for longer.


A chicken tikka is usually medium spice, but sometimes ready meal companies can get it wrong…sometimes to spicy and sometimes completely tasteless. Some how Look What We Found! captured the taste of the type of chicken tikka you can get from a restaurant, apart from the fact that there was better chicken and it tasted a lot fresher!


The only thing is…if you like big potions this isn’t going to fill you up. But then again, no ready meal will. In terms of an easy option for a long day that satisfies a craving for something really unhealthy, this is tremendous! As my home county is Staffordshire, I want to support the local farmers, but it’s obviously difficult to do so working in a different part of the country! Look What We Found! makes it easy for me to buy local, British and fresh ready meals, perfectly gluten free!!

Tuesday 23 July 2013

Ilumi - Tom Kha Gai Soup

-->

I have so far been very impressed with Ilumi products. They taste fresh, healthy and perfectly seasoned.


I have been spending a great deal of time commuting too and from my current work experience at Dinosaur PR in Leeds. I have been blogging for different companies, learning about community management and social media and SEO. This is my second week here at Dinosaur PR and I have got myself into a little routine.


I get home at about 6:30 and as I have to get up at 6am every morning, I am usually too tired to cook a proper meal. But thanks to Ilumi I can enjoy a fantastic, fresh meal with no real cooking at all!


Last night I tried the Tom Kha Gai Soup which I had been saving up for one of those nights when you just need some comfort food! At around 330 calories it worked out as a really great option for a low calorie dinner.


The main ingredient is coconut milk, which has some wonderful health benefits. Per cup, coconut milk contains 89 milligrams of magnesium. Magnesium helps to calm your nerves and helps you to maintain a healthy blood pressure….so if you are feeling stressed…treat yourself to this soup! Coconut milk is also a rich source of fiber, which means that this soup will keep you feeling fuller for longer! Along with this the soup contains generous amounts of chicken, which obviously is a great, lean protein, which keeps fills you up.


I was absolutely starving when I got home last night and after a bit of a stressful journey home, this was the perfect meal to relax me and to fill me up!


The soup tasted delicious. When I got all of the soup out of the sachet I thought it was a bit of a small portion, and originally I didn’t think it was worth the 330 calories. However, after I had eaten it I felt full and satisfied…so don’t be put off by the small portion size!


I love the taste of Thai food, and this soup contained a perfect balance of the different spices and flavors Ilumi used. Overall, if you want a quick dinner that is warm, delicious and has plenty of health benefits…this is definitely one to try!

Thursday 18 July 2013

Breakfast at Buckingham Palace


Last weekend I went to the Coronation Festival at Buckingham Palace in London. It was a day to feel pretty, to walk in the palace gardens and to dine like kings and queens! I have to say the whole day was amazing. The idea of the festival is to showcase all the current Royal Warranted products to members of the general public. From interior design to bookbinding, tailors to shoe makers and cleaning products to food. It was an opportunity to experience the Queens gardens and to see the highest quality products this country had to offer.  
I had breakfast at Mosimanns, and e-mailed in advance to let them know I was gluten-free. I was questioning what i would get...whether they would just miss out ingredients or whether they would give replacements. To my amazement, breakfast was absolutely phenomenal, nothing was left out or skimped on!


Smoked salmon, cottage cheese and scrambled eggs with chives…what more could you ask for? I realised that there is a clear difference between good and bad smoked salmon. The stuff I occasionally buy from supermarkets is tasty …but is oily and slimy. The smoked salmon here just fell apart when you picked it up. Not oily at all! The cottage cheese with scrambled eggs and chives were a step above the rest. I wouldn’t have thought scrambled eggs could be ‘divine’ but that seems to be the only word for them!

After this ‘main course’ there was a bacon sandwich, all gluten free of course! It was packed with about 6 pieces of bacon and the gluten free bread was crunchy and actually had flavour which was a nice change!
Finally we had some natural yogurt and berry compote. Again, beautiful…the yogurt was creamy, the compote wasn’t too tart.


Mosimann’s isn’t the kind of place you get to eat at every day. I count myself incredibly lucky to have experienced the meals they create. Alike everything else at the festival, this restaurant is Royal Warranted and required a membership to dine there. But for this single day, I got the opportunity to dine like royalty. What an experience!  

Friday 5 July 2013

Gluten Free Scones

-->
This gluten – free scone recipe is one of the simplest ones I have found! I have made some tweaks and adjustments in order to make it low calorie and healthier. The recipe makes 8 scones. Perfect for a picnic or after a summer barbeque!
  • 250g (8oz) gluten free self-raising flour. I use Doves Farm – Available in most supermarkets and does contain xantham gum so the dough binds. (If you are using normal gluten free flour just add ½ a teaspoon of xantham gum – it is needed and its effectively very low calorie fibre!)
  • 1 level teaspoon of gluten-free baking powder.
  • 50g ( 1 ¾  oz) low fat margarine or stork.
  • 50g (1 ¾ oz) caster sugar – I tend to replace half with sweetener as it does the job and dramatically decreases calories!
  • 1 medium egg.
  • 150 ml (1/4 pint) skimmed milk.
  • Beaten egg to glaze.
  • 1-2 tsp granulated sugar to sprinkle on top! 


Method
  1. Set the oven to gas mark 7 or 220° C.
  2. Sift the flour and baking powder into a bowl.
  3. Rub in the butter until the mixture – this make take a couple of minutes but the mixture must look like breadcrumbs! This is one of the most important steps of the recipe.
  4. Stir in sugar and sweetener.
  5. Beat together the egg and the milk.
  6. Add to the flour mixture and stir gently until it is smooth.
  7. Due to it being gluten free the mixture is wetter than normal scone mixtures – but do not worry! It doesn’t matter! Simply scoop the mixture with an ice-cream scoop onto a lined baking tray (About 8 times).
  8. Brush over a little bit of egg and add some sugar to the top – just a little sprinkling but it makes a huge difference!
  9. Bake for 15-20  mins or until they are lightly golden in colour.
  10. Once the scones are out of the oven, take away the baking sheet and place onto a wire rack to ensure they do not get soggy.
  11. To serve, if I’m having a blow out I have to admit…I do enjoy clotted cream and strawberry jam! However, for a healthier option frozen yogurt and Jam is also delicious, or margarine. Anything you like really! Get creative!


Enjoy!